Multi-shot Panos
If you are reading this blog, you probably were linked here from from the video I did on panorama photography and which currently has more than 156,000 views and hundreds of comments. If you are one of my regular blog readers (thank you!) you may want to see that video yourself.
The questions I’m often asked are what does the final product look like, how did you take it, and do you have any final thoughts that might help me to create better panos.
Some Background
First, an explanation is in order. While my wife was recording this video for me, a first for her, I should add, I was too concerned with demonstrating the process that I use to actually pay much attention to getting perfect results. So, I did not create the pano itself that day. Since that day, I have re-visited the site on the Hawaiian island of Maui many times, but never to do a pano.
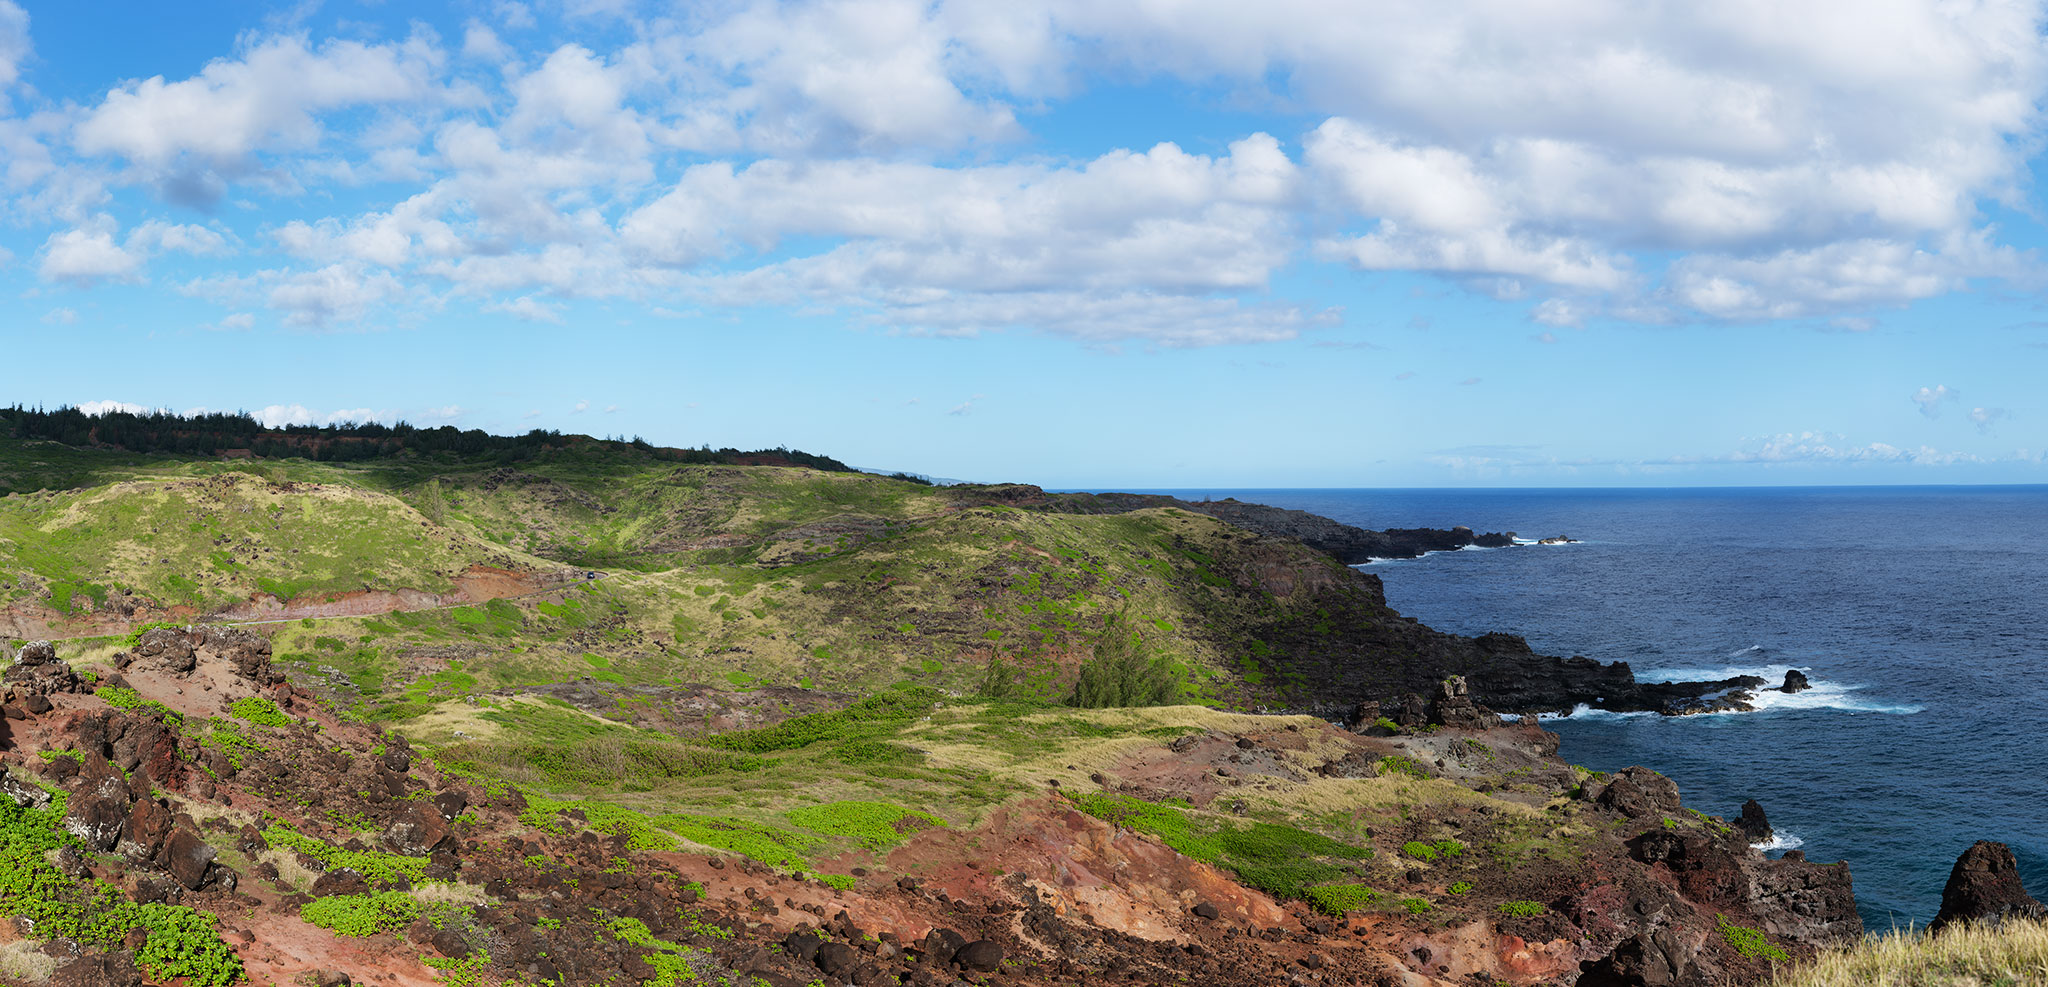
Finally, this winter I was able to get back to the site with the express purpose of creating that exact pano that I demonstrate in the video. Here are some details.
The Details
The pano was shot on a Really Right Stuff tripod with a leveling base, which simplifies the issue of getting your setup perfectly level.
I shot this with a medium format Fujifilm GFX-100 with a 120mm lens, which is equivalent to a 90mm lens in 35mm format. No filters were used. I took 9 RAW images across in 4 rows, allowing my usual 1/3 overlap between frames, both horizontally and vertically. Each image on the GFX-100 is 100MP. The image is straight out of camera, unsharpened, and stitched in Photoshop.
I had to shoot this at the precisely wrong time of day in order to give you a good demo. Rain was forecast for later that day and, indeed, we were caught in it on a winding, precipitous road on the way back to our lodging. If I were shooting this for a client or an exhibition I would have shot it right after sunrise or nearer to sunset, weather permitting.
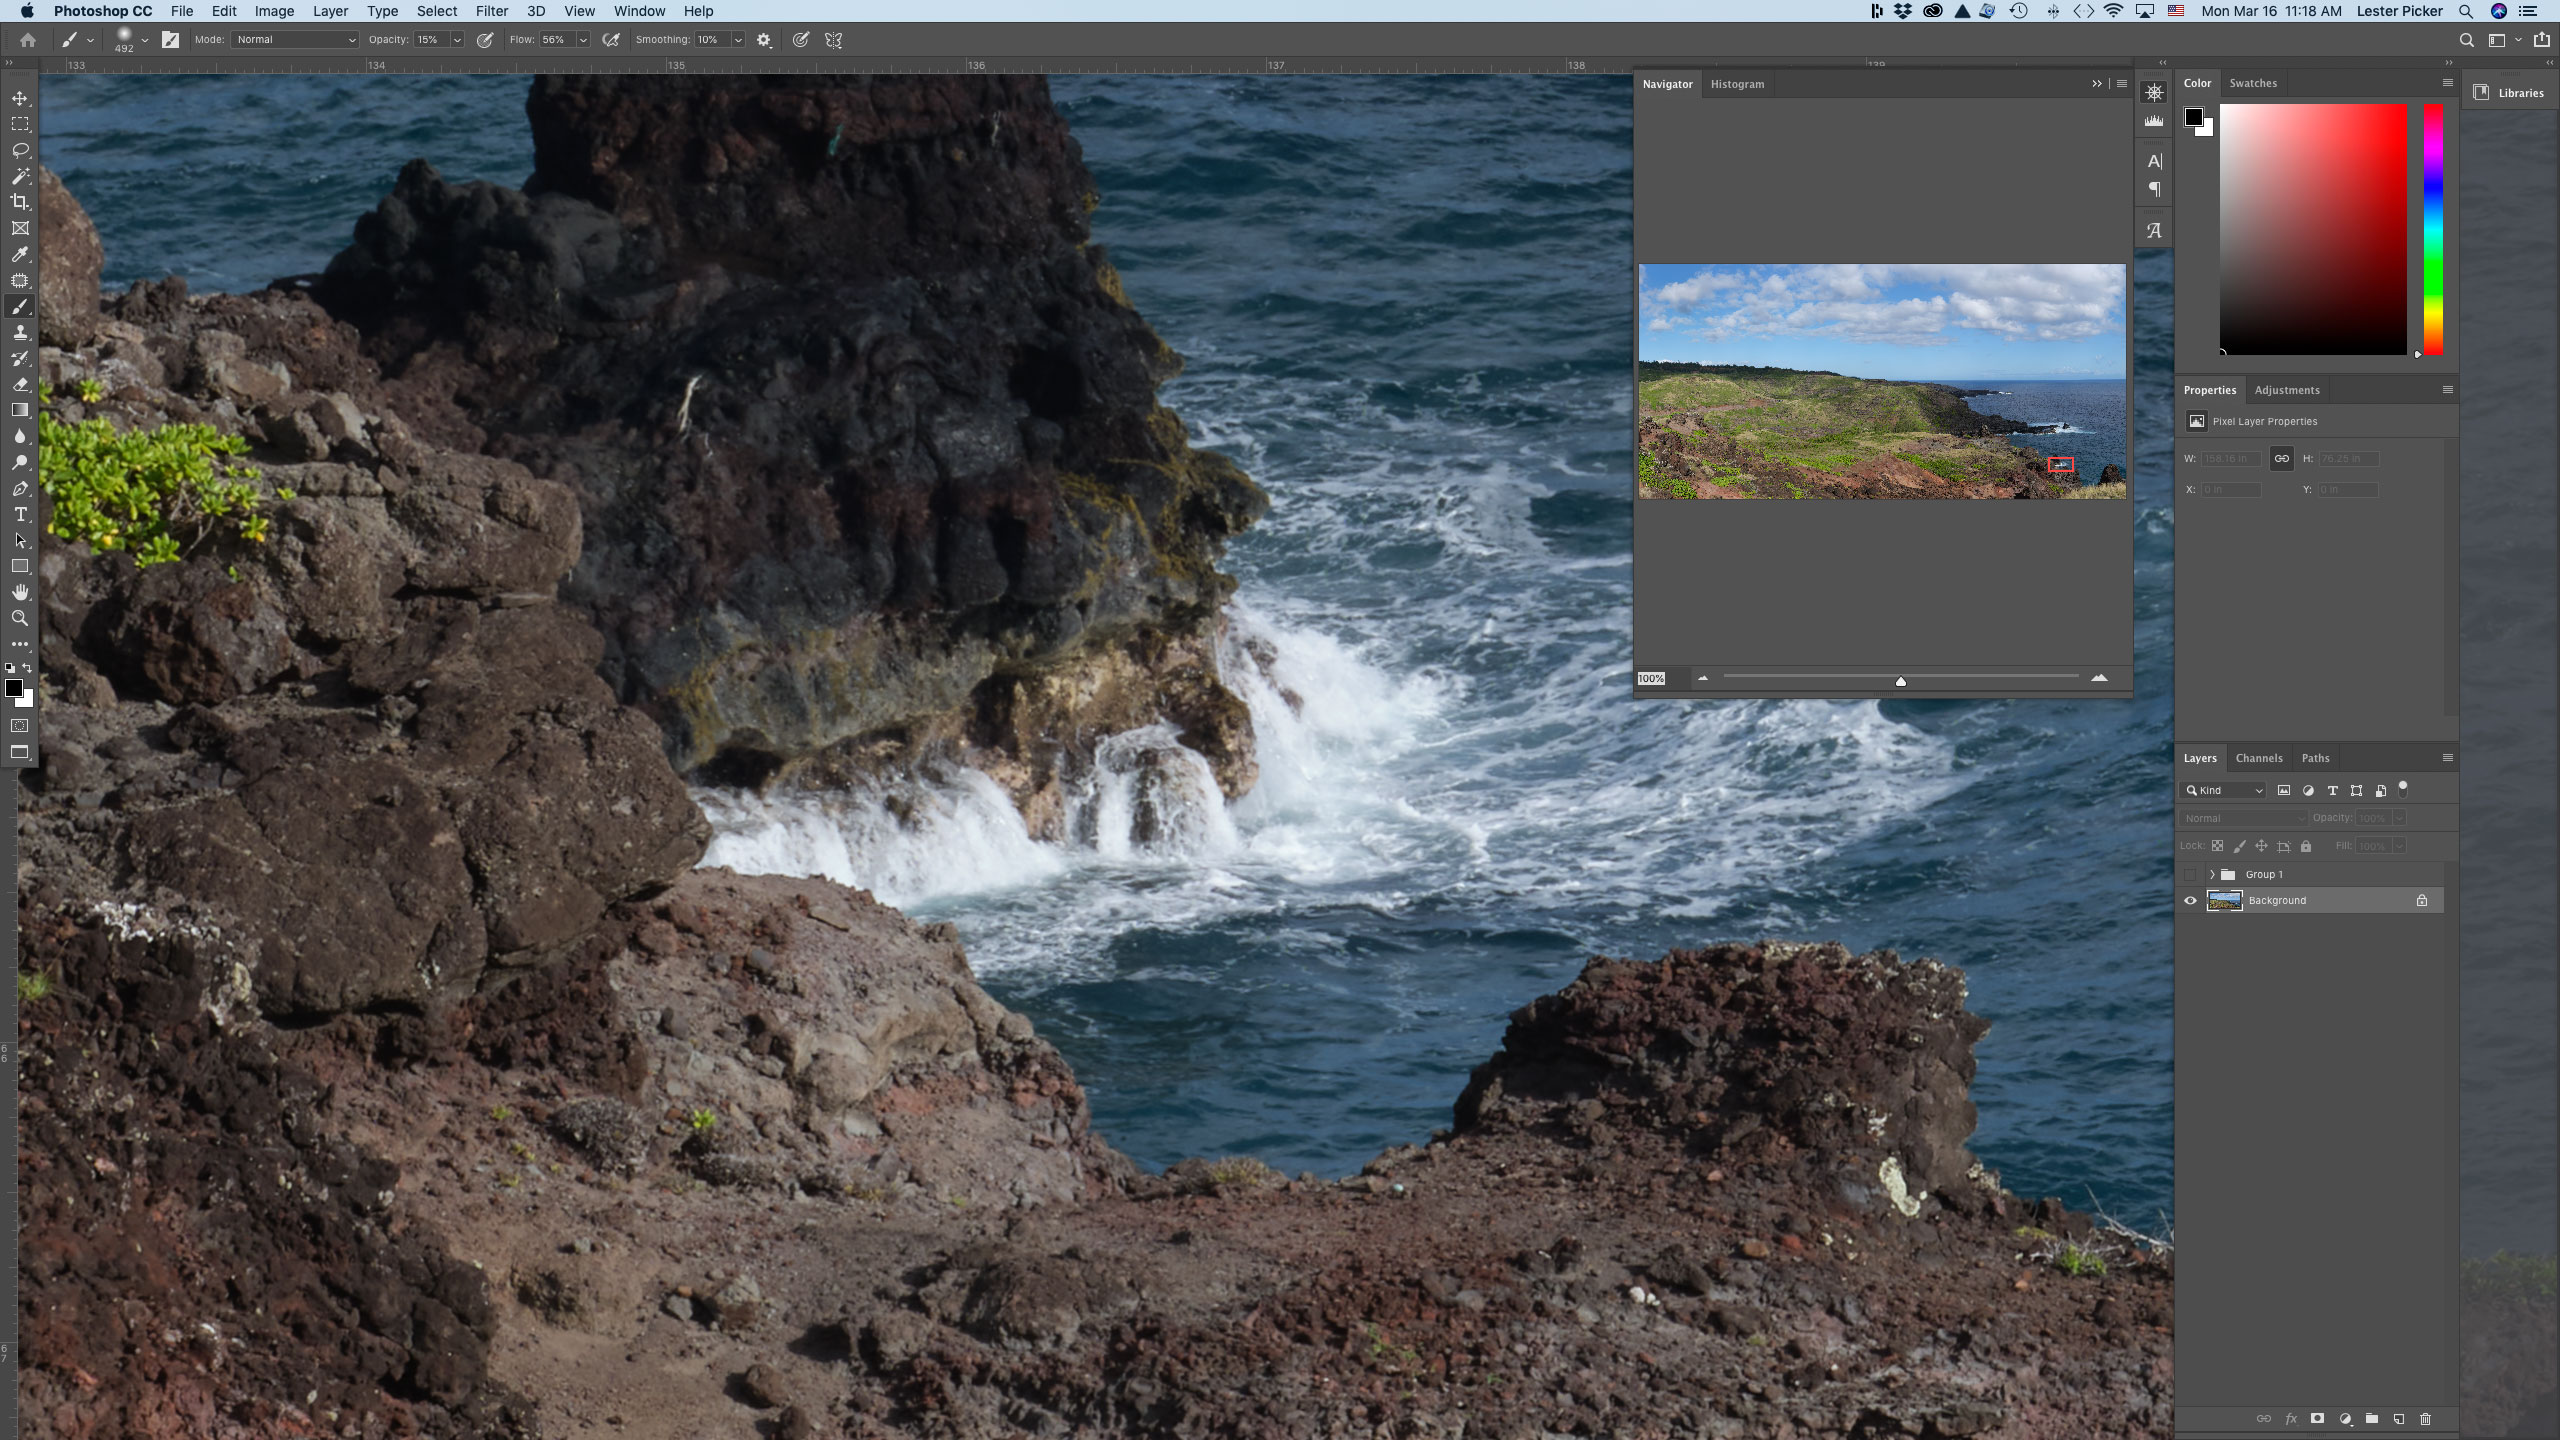
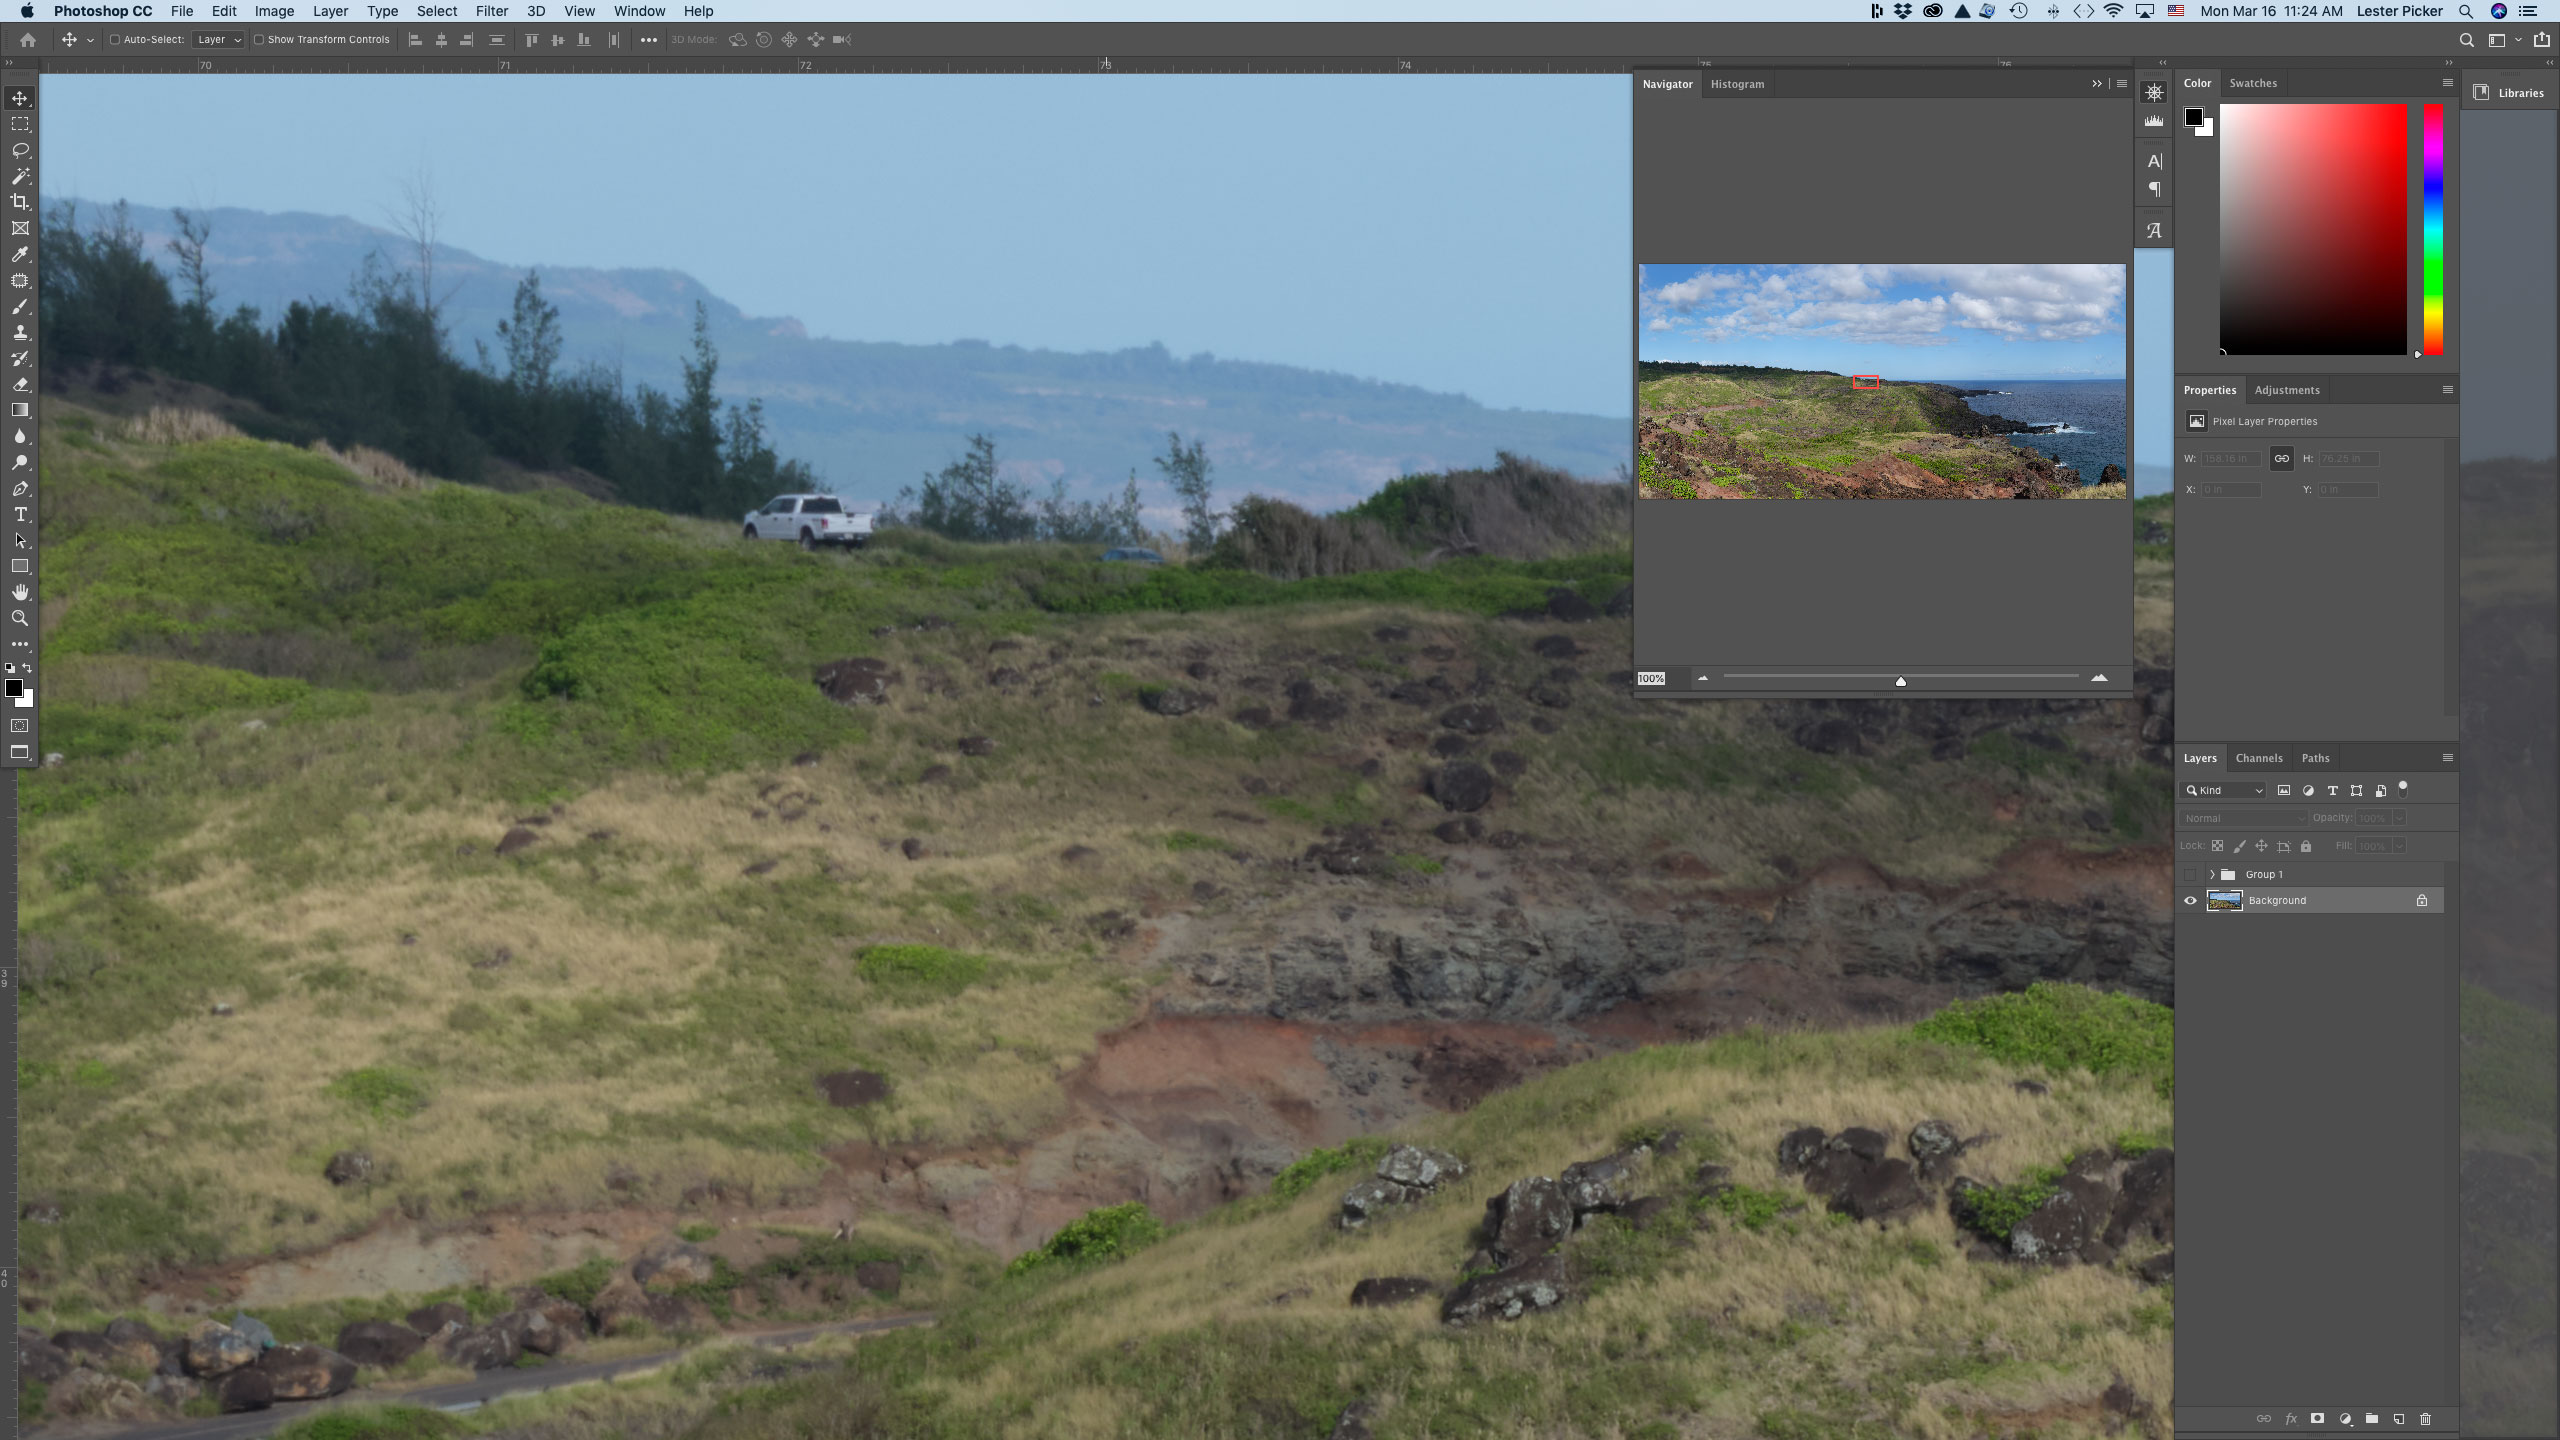
This is one huge pano, even though it does not cover a terribly wide horizontal area. The resulting stitched image came in at 7 Gigabytes! Below is a screenshot zoomed in to 100% image from a 27" iMac. Feel free to download the screen shot and look at all the pixels I’m looking at.
At 300 DPI, that would mean a print 13 feet wide by 6-1/2 feet tall (47,448 Px x 22,874 Px). At 150 DPI, which is how most people would print a pano like this for a mural or wall covering, you would get a print that’s 26 feet long by 13 feet wide!!
Some Thoughts
As Ansel Adams said, pre-visualization is important, and I suggest that is especially true for panos. This pano is pre-visualization on steroids.
One thing to keep in mind is that Depth of Field (DOF) becomes an issue with panos like this, where foreground and background subjects are involved. The more pixels you shoot per frame and the more tele your lens, the more you can magnify. Therefore DOF is never going to be perfect and certainly not as good as a wide angle lens, assuming you are using all of those pixels for greater magnification. Keep this in mind when choosing an aperture, focus plane, and composition.
Another strategic issue… this image involves water and clouds. As a result you end up having to strategize and juggle DOF, shutter speed, lens choice and f-stop to nail your pre-visualized image. Of course, focus stacking could theoretically work, but by time you finished even half a row any moving subjects, or even changing light would be a huge problem.
Ocean water is in constant motion as are clouds. Sharp water chop, waves, or anything that moves across a stitched frame can look really bad. Sure, a neutral density filter would make the water look nicer, but that would lengthen the time it takes you to complete a pano by minutes.
That is why I always suggest that even before you shoot your pano, you nail a ‘perfect’ wide-angle shot as insurance. There isn’t a one-size fits all recipe. It depends on the scene, hence the importance of pre-visualization and thinking things through before starting the pano.
With that as background, just look at the incredible level of detail in this pano. In the full image you cannot even see that there is a white pickup truck in full view!
That detail is one reason I love to do panos that we print crazy large for our clients. We have done pano murals that are 25-30 feet wide with such detail you can see people standing in office windows even though I shot the pano from a mile away (with a 400mm lens)!
I do hope this helps round out the pano creation video for you and I apologize for waiting so long to get a finished product to you.